ASST0: Introduction to OS/161
This assignment is available online at
https://www.ops-class.org/asst/0/.
The online version is easier to read and includes helpful links, embedded
video walkthroughs, and other useful resources.
|
1. Introduction
This assignment introduces you to the OS/161 source code and toolchain that you will use throughout the rest of the assignments.
It is unlikely that you have used OS/161 before, but some of the other tools may be familiar to you:
-
OS/161 includes both
-
the sources of the the operating system you will be designing, implementing, running and debugging, and
-
a toolchain for cross compiling and running your kernel, including a machine simulator called
sys1611.
-
-
Git: a distributed source control tool that tracks your changes to OS/161 and enables effective collaboration.
-
GDB: the GNU debugger which allows you to control and inspect your running system.
1.1. Objectives
After completing ASST0 you should:
-
Have set up your OS/161 development environment.
-
Understand the source code structure of OS/161.
-
Be comfortable navigating the OS/161 sources to determine where and how things are done.
-
Have been introduced to Git and GDB.
-
Be able to, modify, build and run your first OS/161 kernel.
1.2. A Note on Cut-and-Paste
Another assignment objective is to get you working efficiently in a Linux development environment using standard command-line development tools. Unlike many of the things you will find online ASST0 is not a tutorial. You will go slower, but you will learn a lot more from figuring out how to: "Run the first OS/161 thread test and then shut down your kernel" than how to:
trinity@zion:~$ sys161 kernel "tt1;q"
Following these kinds of written instructions will also better prepare you to interact with other OS/161 hackers in person and in the online forum.
1.3. A Note on Learning Git
Another objective of this course is to help you learn to use common development tools, particularly Git. However, like most programming tools the best way to learn Git is through the extensive online documentation and multiple good online tutorials (1, 2, etc.).
As a result, we have removed Git coverage from this introduction. Any documentation we could provide is unlikely to be complete and up-to-date, and this will also provide you with good practice in online learning. Feel free to ask your course staff or other students for help, either in person or using the forum. Chances are many of them use Git on a daily basis.
Like anything else, learning Git takes practice, more practice, and patience. But here’s one tip: read the output generated by Git commands. Git produces remarkably useful output, particularly when an error occurs or when it didn’t accomplished what you wanted. Frequently the output tells you exactly what to do to fix the problem—down to the commands that you should type.
1.4. Collaboration Guidelines
ASST0 focuses on getting your environment set up and familiarizing you with the source code you will be modifying. There is a small amount of coding involved, but not too much. Here are guidelines for how to work with your partner—if you have one—and with other students:
| Working side-by-side with your partner is strongly encouraged. |
Helping other students set up their ops-class.org environment is
encouraged.
|
| Helping each other with Git is encouraged. |
| Discussing the code reading questions and browsing the source code with other students is encouraged. |
| Dividing the code reading questions and development tasks between partners is discouraged. |
| Copying any answers from anyone who is not your partner or anywhere else and submitting them as your own is cheating. |
| You may not refer to or incorporate any external sources without explicit permission 2. |
2. Choosing and Initializing Your Development Environment
Developing for OS/161 requires specialized tools.
These comprise the test161 testing framework, the sys161 system
simulator, and cross-compilers to create sys161 executables.
Instructions for obtaining the OS/161 toolchain and source code are available on the setup page. Please follow those instructions carefully and return when have the toolchain set up. We’ll download the sources below.
3. Configuring, Building, and Running a Kernel
Now that you have your development environment ready, on to the fun stuff: building and booting your first OS/161 kernel.
3.1. Download the OS/161 Source Code
We distribute the ops-class.org OS/161 source code
using Git.
Starting with a clone of our repository makes it easy for us to distribute
updates, which can be merged easily into your repository.
First, choose a directory to work in:
-
If you are using our Vagrant virtual machine, you can run Git either inside or outside of your virtual machine, assuming your host machine has Git installed. For simplicity, we suggest cloning the sources inside your virtual machine in
/home/trinity/src, which should be an empty directory. -
If you have the toolchain installed natively you can create your source directory wherever you want.
Let’s say you’ve chosen a directory called src, which should either not
exist or (in the case of the Vagrant VM) be empty. Clone
our ops-class.org Git repository. into that directory.
Note that we refer to this directory as your source directory. In contrast,
your root directory is where your built kernel and other binaries are
installed and where you run sys161.
3.2. Configure Your OS/161 Source Tree
The next step is to configure the OS/161 sources by running the configure
command located at the base of your source tree. You need to do this (very
short) step only when you completely remove your source tree for some reason.
The only configuration step is to set up where various binaries—including
system executable and your kernel—will be created when you run make in
later steps. Run configure --help to find out more including available
command line options.
Note that by default OS/161 installs things to the root directory
$HOME/os161/root, which is a fine plan to put things if you are working on
a shared machine. For our dedicated VM we use $HOME/root to shorten the
directory paths a bit, but this requires that you use the --ostree argument
to configure. If you forget this argument either now or when you need to
rerun configure later, you will install things into $HOME/os161/root.
This has caused confusion for some students previously, so please be
careful.
3.3. Configure Your OS/161 Kernel
The kernel sources for OS/161 are in the kern subdirectory, which has its
own configuration script. Change into kern/conf and look around. You should
notice a configuration script, a base configuration file (conf.kern), and
four configurations that include conf.kern.
You should take a look at conf.kern and one of the configurations to get a
sense of the format. But for now, the only thing we’re concerned about is
ensuring that we enable dumbvm for this assignment. You’re going to write a
full-fledged virtual memory (VM) system in ASST3, but for the first few
assignments dumbvm provides enough of a "dumb" VM to allow you to proceed.
Configure a kernel now with dumbvm enabled.
The OS/161 kernel configuration process sets various options that control how
your kernel gets built, so unlike the configuration step above you will
probably need to modify these files at some point during later assignments.
In particular, conf.kern determines what source files get included in your
kernel build, so if you add sources to the kernel you’ll need to add them to
conf.kern as well.
3.4. Build Your OS/161 Kernel
Once you’re successfully configured your OS/161 kernel you should have a directory to compile in, as well as a reminder about a build step that you might forget. Once you change into that directory you are ready to build a kernel!
One important note before you start. You are probably used to using
GNU make to build software on UNIX-like
systems. However, the OS/161 sources use
BSD make, which has a different
Makefile syntax 3. To avoid confusion, BSD make has
been installed on your system as bmake. So while you might normally run
make clean to reset your build and remove all of the build targets, when
working with OS/161 you would run bmake clean.
There are three steps:
-
Building the dependencies (
bmake depend). This scans all of the source files that you have configured to be part of your kernel and ensures that all their header files are also included. -
Building the kernel (
bmake). This generates your kernel binary. -
Installing the kernel (
bmake install). This installs your kernel into the root directory that you configured above.
Run these three commands now and check that they complete successfully. Then change into your root directory and look around. You should see a fresh kernel. If you don’t, review the steps above until your kernel builds successfully.
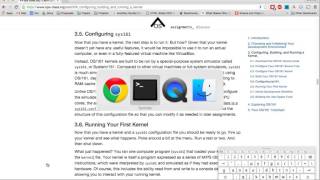
3.5. Configuring sys161
Now that you have a kernel, the next step is to run it. But how? Given that your kernel doesn’t yet have any useful features, it would be impossible to run it on real hardware, or even in a fully-featured VM like VirtualBox.
Instead, OS/161 kernels are built to be run by a special-purpose system
simulator called sys161, or System/161.
Compared to other VMs or full-system simulators, sys161 is simpler and
faster but retains enough realism to enable OS/161 kernel development.
Apart from floating point support and certain issues relating to RAM cache
management, it provides an accurate emulation of a MIPS processor
4.
Unlike OS/161, we do not expect you to modify sys161. However, you do
need to configure the simulated machine that sys161 provides by choosing
the number of simulated CPU cores, the amount of simulated memory, and the
number of simulated disk drives. Here is a
sys161.conf file that you can use to get started. You should read and
understand the structure of this configuration file so that you can modify it
as needed in later assignments.
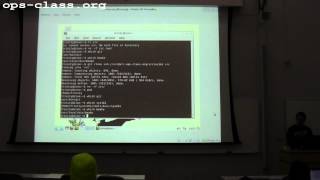
3.6. Running Your First Kernel
Now that you have a kernel and a sys161 configuration file you should be
ready to go. Fire up your kernel and see what happens. Poke around a bit at
the menu. Run a test or two. And then shut down.
What just happened? You ran one computer program (sys161) that loaded your
kernel (from the kernel) file. Your kernel is itself a program expressed as
a series of MIPS r3000 instructions, which were interpreted by sys161 and
simulated as if they had executed on real hardware. Of course, this includes
the ability read from and write to a console device, allowing you to interact
with your running kernel.
Examine the output produced by your kernel as it boots and shuts down. You should be able to answer the following questions:
-
Which version of System/161 and OS/161 are you using?
-
Where was OS/161 developed and copyrighted?
-
How much memory and how many CPU cores was System/161 configured to use?
-
What configuration was used by your running kernel?
-
How many times has your kernel been compiled?
Before going on try the following exercises:
-
Boot your OS/161 kernel with 8 cores.
-
Try booting with 256K of memory. What happens?
-
Configure System/161 to use a fixed value to initialize its random number generator. (This can be helpful when debugging non-deterministic kernel behavior.)
3.7. Kernel Development Workflow
As you saw above, building an OS/161 kernel from scratch involves five steps:
-
Configuring the entire OS/161 source tree by running
configurein the root of the source directory -
Configuring the kernel by running
configin thekern/confsubdirectory -
Building the dependencies by running
bmake dependin the compilation subdirectory -
Building the kernel by running
bmake -
Installing the kernel by running
bmake install
The first step only needs to be done when you download a new OS/161 source
tree. The second step only needs to be done when you start a new assignment
or add files to your kernel build by editing kern/conf/conf.kern.
Rebuilding the dependencies in step three is also not usually necessary
unless you have reconfigured your kernel.
So that leaves the last two (bmake ; bmake install) as your normal kernel
development workflow. Note that bmake is usually smart enough to detect
what you changed and not recompile things unnecessarily, but if you think
that it hasn’t accomplished that correctly you can always run a bmake clean
to force it to start over.
However, if things aren’t building properly you may want to rerun the kernel configuration and dependencies steps just to be sure. Step 1 is almost never necessary to repeat unless you’ve completely started over and removed your entire previous OS/161 source tree.
3.8. Building the User Space Tools
If you change into your root directory you should see only a few files,
including your compiled kernel, a symbolic link pointing to that kernel, and
the sys161.conf file that configures sys161. That’s fine for now, and all
your need until ASST2.
But your OS/161 kernel would not be very interesting or useful if it couldn’t
run user programs. So let’s build those now. Head over to the base of your
source directory and run bmake followed by bmake install. This generates
a lot of output, but when it’s done return to your root directory. You should
see a directory structure including bin and testbin directories
containing cross-compiled user binaries that your OS/161 kernel will
eventually be able to run.
Note that building the user space tools is not part of the kernel
development cycle. Unless you modify or add tests in the userland
subdirectory of your source directory—which you are encouraged to do—you
should not need to rebuild or reinstall these binaries. And until you begin
ASST2 your kernel can’t run user binaries anyway, so this part of the build
process is completely useless. We only point this out because compiling and
installing the user space tools takes enough time to be annoying, so don’t
let it slow you down unnecessarily. Focus your development loop on your
kernel.
4. Exploring OS/161
One of the core challenges of the ops-class.org assignments is working with
OS/161, a large, complicated, and unfamiliar code base.
OS/161 contains roughly 40K non-commenting lines of code and 25K comments spread across 570 C, header, and assembly files. Reading and understanding all of that code would take much more time than you want to spend. And of course you are going to make things worse, since your solutions will add considerably to what is already there 5.
Luckily, OS/161 contains a large amount of code that you never need to
understand or change, some amount of code that you need to be familiar but
not intimate with, and a small amount that you must understand in detail.
Distinguishing between these categories is critical to your success. For
example, the LAMEbus, semaphore, and loadelf source code each fall into
one of these three categories. See if you can decide which is which, or
return to this question after you work on some of the questions below.
To become familiar with a code base, there is no substitute for actually poking around. Browse through the tree a bit to get a sense of how things are structured. Glance through some source code for files that look interesting. OS/161 is also very well commented, as befits a pedagogical code base.
Most of the OS/161 sources are C source (.c) and header (.h) files. Your
kernel does also contain a bit of assembly code (.S) files. You will not
need to understand or modify the assembly code, but it does contain some
fairly interesting pieces of code executed during boot and during context
switches. So you may want to take a look at it at some point. The assembly
code is also extremely well commented 6.
You should use the code reading questions below to guide an initial
exploration of the OS/161 sources. While the questions won’t require you look
at every line of code or even every file, we strongly recommend that you at
least glance at all the kernel sources in the kern subdirectory.
Some parts of the code may seem confusing since we have not discussed how any OS/161 subsystems work. However, it is still useful to review the code now and get a high-level idea of what is happening in each subsystem. If you do not understand the low-level details now, that is fine.
4.1. The Top of the Source Directory
Your OS/161 source directory contains the following files:
-
CHANGES: describes the evolution of OS/161 and changes in previous versions. -
configure: the top-level configuration script that you ran previously. -
Makefile: the top-levelMakefileused to build the user space binaries.
The source directory contains the following subdirectories:
-
common/: code used both by the kernel and user programs, mostly standard C library functions. -
design/: contains design documents describing several OS/161 components. -
kern/: the kernel source code, and the subdirectory where you will spend most of your time. -
man/: the OS/161 man pages appear here. The man pages document (or specify) every program, every function in the C library, and every system call. You will use the system call man pages for reference in the course of ASST2. The man pages are HTML and can be read with any browser. -
mk/: fragments ofMakefilesused to build the system. -
userland/: user space libraries and program code.
If you have previously configured and built in this directory there are also
some additional files and directories that have been created, such as
defs.mk and build/.
4.2. User Land
In the userland/ source subdirectory, you will find:
-
bin/: all the utilities that are typically found in/bin/—`cat`,cp,ls, etc. Programs in/bin/are considered fundamental utilities that the system needs to run. -
include/: these are the include files that you would typically find in/usr/include(in our case, a subset of them). These are user include files, not kernel include files. -
lib/: library code lives here. We have only two libraries:libc, the C standard library, andhostcompat, which is for recompiling OS/161 programs for the host UNIX system. There is also acrt0directory, which contains the startup code for user programs. -
sbin/: this is the source code for the utilities typically found in/sbinon a typical UNIX installation. In our case, there are some utilities that let you halt the machine, power it off, and reboot it, among other things. -
testbin/: these are pieces of test code that we will use to test and grade your assignments.
You don’t need to understand the files in userland/bin/, userland/sbin/,
and userland/testbin/ now, but you certainly will later on. Eventually, you
will want to modify these or write your own utilities and these are good
models. Similarly, you need not read and understand everything in
userland/lib and userland/include but you should know enough about what’s
there to be able to get around the source tree easily. The rest of our code
walk-through is going to focus on kern/.
4.3. Kernel Sources
Now let’s navigate to the kern/ source subdirectory. Once again, there is a
Makefile. This Makefile installs header files but does not build
anything. In addition, we have more subdirectories for each component of the
kernel as well as some utility directories and configuration files.
4.3.1. kern/arch
This is where architecture-specific code goes. By architecture-specific, we
mean the code that differs depending on the hardware platform on which you’re
running. There are two directories here: mips which contains code specific
to the MIPS processor and sys161 which contains code specific to the
System/161 simulator.
-
kern/arch/mips/conf/conf.arch: this file tells the kernel configuration script where to find the machine-specific, low-level functions it needs (throughoutkern/arch/mips/). -
kern/arch/mips/include/: this folder and its subdirectories include files for the machine-specific constants and functions. -
kern/arch/mips/: The other directories contain source files for the machine-dependent code that the kernel needs to run. Most of this code is quite low-level. -
kern/arch/sys161/conf/conf.arch: Similar tomips/conf/conf.arch. -
kern/arch/sys161/include:These files are include files for the System/161-specific hardware, constants, and functions.
4.3.2. kern/compile/
This is where you build kernels. In the compile directory, you will find one
subdirectory for each kernel configuration target you have used you want to
build. For example, if you configure your kernel with the DUMBVM
configuration to turn on dumbvm, a DUMBVM subdirectory will be created in
kern/compile where you can compile your dumbvm kernel. This directory and
build organization is typical of UNIX installations and is not universal
across all operating systems.
-
kern/conf/config: is the script that takes a configuration file, likeGENERIC, and creates the corresponding build directory.
4.3.3. kern/test/
This directory contains kernel tests that evaluate multiple parts of your
system. Some of these will work right away (km1, km2, sy1), others will
not (sy2, sy3), and others you will have to write (sy5). You are more
than welcome—encouraged even—to add your own kernel tests. However, please
note that during automated tests we will replace the contents of this
directory to ensure that your kernel runs the right tests.
4.3.4. kern/dev/
This is where all the low level device management code is stored. Unless you are really interested, you can safely ignore most of this directory.
4.3.5. kern/include/
These are the include files that the kernel needs. The kern subdirectory
contains include files that are visible not only to the operating system
itself, but also to user programs. Consider why it’s named
"kern" and where the files end up when installed.
4.3.7. kern/main/
This is where the kernel is initialized and where the kernel main function and menu are implemented.
4.3.8. kern/thread/
This directory contains the code implementing the thread abstraction and synchronization primitives.
4.3.9. kern/synchprobs/
This is the directory that contains the starter code that you will need to complete ASST1.
4.3.10. kern/syscall/
This is where you will add code to create and manage user level processes. As it stands now, OS/161 runs only kernel threads—there is no support for user level code. (Try running the shell from the OS/161 menu and see what happens.) In ASST2, you’ll implement this support.
4.3.11. kern/vm/
This directory is also fairly vacant. In ASST3, you’ll implement virtual memory and most of your code will go in here.
4.3.12. kern/vfs/
The file system implementation has two directories which we’ll present in
turn. kern/vfs is the file system independent layer—`vfs` stands
for virtual file system. It establishes a framework into which you can add
new file systems easily. You will want to go look at vfs.h and vnode.h
before looking at this directory.
4.4. Source Exploration Exercises
Use your new-found knowledge of the OS/161 source code to answer the
questions that follow. You may also find standard UNIX utilities like find
and grep useful when searching through your OS/161 source code.
-
What function initializes the kernel during boot, and what subsystems are currently initialized?
-
What VM system does your kernel use by default? What is wrong with it?
-
OS/161 ships with two working synchronization primitives. What are they?
-
How do you create a thread in OS/161? Give some examples of code that currently creates multiple threads.
-
OS/161 has a system for printing debugging messages to the console. How does it work? How could it be useful?
-
What do
copyinandcopyoutdo? What is special about these functions compared to other approaches to copying memory in C, likememmove? -
What is a zombie thread?
-
What is the difference between a thread sleeping and a thread yielding?
-
Explain the difference between machine dependent and machine independent code. Where would you put both in the OS/161 source tree?
-
What functions are used to enable and restore interrupts? Would this be sufficient to ensure mutual exclusion on an OS/161 kernel?
5. Your OS/161 Toolchain
Successfully developing an OS/161 kernel requires more than just building and running a kernel. You also need to edit source code, share code with others, and debug and test your kernel.
To complete ASST0, we’ll provide an overview and some exercises using the rest of the OS/161 toolchain: in particular, Git and GDB. But let’s start with discussing how to edit OS/161 source code.
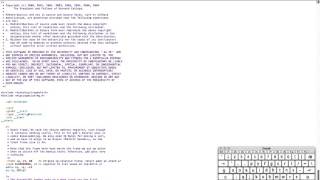
5.1. Editing OS/161
While we don’t specifically support any particular editing or code browsing
software, we suggest that you use an editor that is designed for working with
source code. Command line tools like vim work well and, when combined with
ctags and tmux, produce a very powerful command-line development
environment. Graphical editors like Eclipse or Visual Studio are also fine
but more of a hassle to set up. Decide what works best for you.
When you read and begin to modify source code, you will also want to absorb it’s stylistic conventions. Like any other hacker, David Holland has his preferences about indentation, line width, function signatures, where to put braces, and tabs versus spaces. Adopting these will make it much easier to work on OS/161 and ensure that your changes fit in. This is also a critical skill to learn as you begin to contribute to other shared code bases. At minimum, you and your partner should agree on style so that you don’t drive each other crazy or spend hours reformatting each others' code.
5.2. Collaborating with Git

As described previously, we are not going to go into the use of Git in
detail. But we will point out that using Git is not optional for completing
the ops-class.org assignments. We distribute our base sources using Git
and will use Git to push updates to you. Our testing tool, test161, submits
assignments for testing using Git.
One additional requirement is that you have a private Git repository so
that you do not inadvertently share your solutions with others. The test161
submission system will refuse to grade your assignments if it detects that
your Git repository is public. Getting your hands on a private Git repository
is not hard. If you are a student,
GitHub will allow you to set
up a limited number of private repositories for instructional use.
GitLab.com provides private Git repositories for
free, as do other sites such as
BitBucket. And your course
staff may also set up private Git repositories for you to use.
If you are completing the ops-class.org assignments alone, you may wonder
whether you need Git. The short answer is yes. Every programmer, including
you, should get in the habit of setting up version control every time you
start a project. It’s the first thing that you should do. Always. Every time.
No exceptions. Why? There are a lot of reasons.
Google them.
5.2.1. Git exercises
If you are just getting started with Git, here are some exercises specific to OS/161 that you may want to try:
-
Modify your kernel so that it prints out your email address at the right spot during boot. Use Git to show what files have changed. Commit your changes, and confirm that your work tree is now clean. Use Git to show the history of your repository, and to generate a line-by-line breakdown of who is responsible for each of the current lines in the file that prints the menu.
-
Modify your kernel so that it prints a bad word during boot. Use Git to show what files have changed. Decide that this is bad idea and use Git to back out your change.
-
Modify your kernel so that it builds but does not boot. (Try adding a null pointer exception somewhere during the boot sequence or in the menu.) Check in your changes and build a kernel. Run your kernel and realize your mistake. Use Git to revert your previous commit containing the mistake. Confirm that your kernel now builds and boots properly.
-
Repeat the previous exercise but make your changes in a new branch. When you realize your mistake, return to your master branch and show that you can still build and boot. At that point abandon and delete the new branch you created.
-
Set up a private remote repository so that you and your partner can share changes. Configure your repository so that it pushes and pulls your master branch to your new repository by default. Pick a file to edit jointly, something long enough so that you both can add changes. Add a comment to the top of the file. Have your partner add a comment to the bottom of the file. Use Git to merge your changes through the remote repository.
-
Pick another file to edit jointly, but this time create a conflict by both adding different comments to the same line of the file. Using Git, confirm that the edits create a merge conflict. Use Git to handle the conflict and complete the merge. Try doing this twice and see if you can force each partner to handle the merge conflict.
5.3. Debugging Using GDB

GDB—or the GNU debugger—is another extremely well-documented tool which we
will let you learn on your own. Unlike Git, GDB is not required to complete
the ops-class.org assignments. But that’s like saying that shoes aren’t
required to climb Mt. Everest. You can make it without GDB, through good old
printf debugging and pure deductive reasoning. But it will be very, very
painful. You will be much happier if you learn to use GDB.
The only complication to using GDB to debug your OS/161 kernel is that the
machine simulator sys161 gets in the way. As a result, the way that you
hook up the debugger to your running kernel is a bit different than you might
be used to if you have used GDB previously. For example, if you try this in
your root directory:
os161-gdb sys161 kernelyou will end up debugging sys161, not your kernel, which is not what you
want. And if you run
os161-gdb kernelnothing will happen at all because you haven’t started the sys161 simulator
required to run your kernel.
Instead, you need to start the simulator and the debugger separately.
However, it is critical that they run in the same directory. A terminal
multiplexer like tmux comes in handy here. Here’s what to do:
-
In one terminal, change to your root directory and start your kernel. There is a special option to
sys161that will cause it to wait for a connection from the debugger before booting. Use that to make sure that you can establish the connection before boot. -
In a second terminal, change to your root directory and start the debugger by running
os161-gdb kernel.
Unfortunately, you are not quite done. You may have noticed that the kernel is still waiting for a debugger connection. To establish that connection, type the following at the GDB prompt:
target remote unix:.sockets/gdbAt this point GDB should confirm that it is connected to the sys161
simulator and you can proceed. Note that the kernel is stopped at this point
as if you have set up a breakpoint, so you need to instruct it to continue.
Happily, new versions of sys161 will wait explicitly at shutdown for a
debugger connection if something goes wrong. Try booting your kernel and
running the panic command to observe this behavior. This gives you a chance
to connect a debugger and poke around in cases where your kernel panics and
you weren’t expecting it. That said, we suggest that you always run your
kernel with the debugger attached from boot.
If you get tired of typing these commands, there are ways to set up a GDB
alias for the target command and have it be run when GDB starts. For the
even more adventurous, you can set up a tmux script that will automatically
create two windows, boot your kernel in one and start the debugger in the
other. Programming FTW!
Finally, note that because GDB is debugging your kernel through the sys161
system simulator, not all GDB features are supported. Watchpoints, for
example, are known not to work. In addition, when stepping through code you
should keep in mind that your kernel is multithreaded and that other threads
may have run in-between each step.
5.3.1. GDB exercises
If you are just getting started with GDB, here are some exercises specific to OS/161 that you may want to try:
-
Set a breakpoint on the
panicfunction. Initiate a panic from the kernel menu and confirm that GDB hits the break point. Inspect the call stack and step up and down a few times before allowing the kernel to continue andsys161to exit. -
Create a panic by modifying your OS/161 source code. Use GDB to find the source of the panic. If you are working with a partner, have your partner hide a panic in the source code and use GDB to find it. Then hide one for them.
-
Step through kernel boot, stepping in to and over a few of the boot helper functions that initialize various subsystems.
-
Put a breakpoint on the kernel exception handler and step through it when it fires. Use it to determine what generates exceptions when your kernel is sitting idly at the menu.